How do Turbo Streams Work (behind the scenes)
Turbo Streams allows you to update specific parts of your app upon a web request (controller action), referred to as just Turbo Streams. Or as a Turbo Stream Broadcasts when fired by your back end (on model create, update or destroy or manually from any object) over websockets, typically through ActionCable.
While the source is different, the response (HTML) for both are the same. I want to quickly explain how Turbo Streams work, so you understand that there is, just like with Rails, no magic involved 🎩🐰. Just Plain Old JavaScript!
To broadcast a Turbo Stream you do something like this:
class Resource < ApplicationRecord
  after_create_commit -> { broadcast_append_to "resources" }
end
And for controller actions (or inline in the controller, if that’s your jam):
<turbo-stream action="append" target="resources">
  <%= render @resource %>
</turbo-stream>
So what’s the response (HTML) sent over for both options?
<turbo-stream action="append" target="resources">
  <template>
    <!-- HTML content of the Resource -->
  </template>
</turbo-stream>
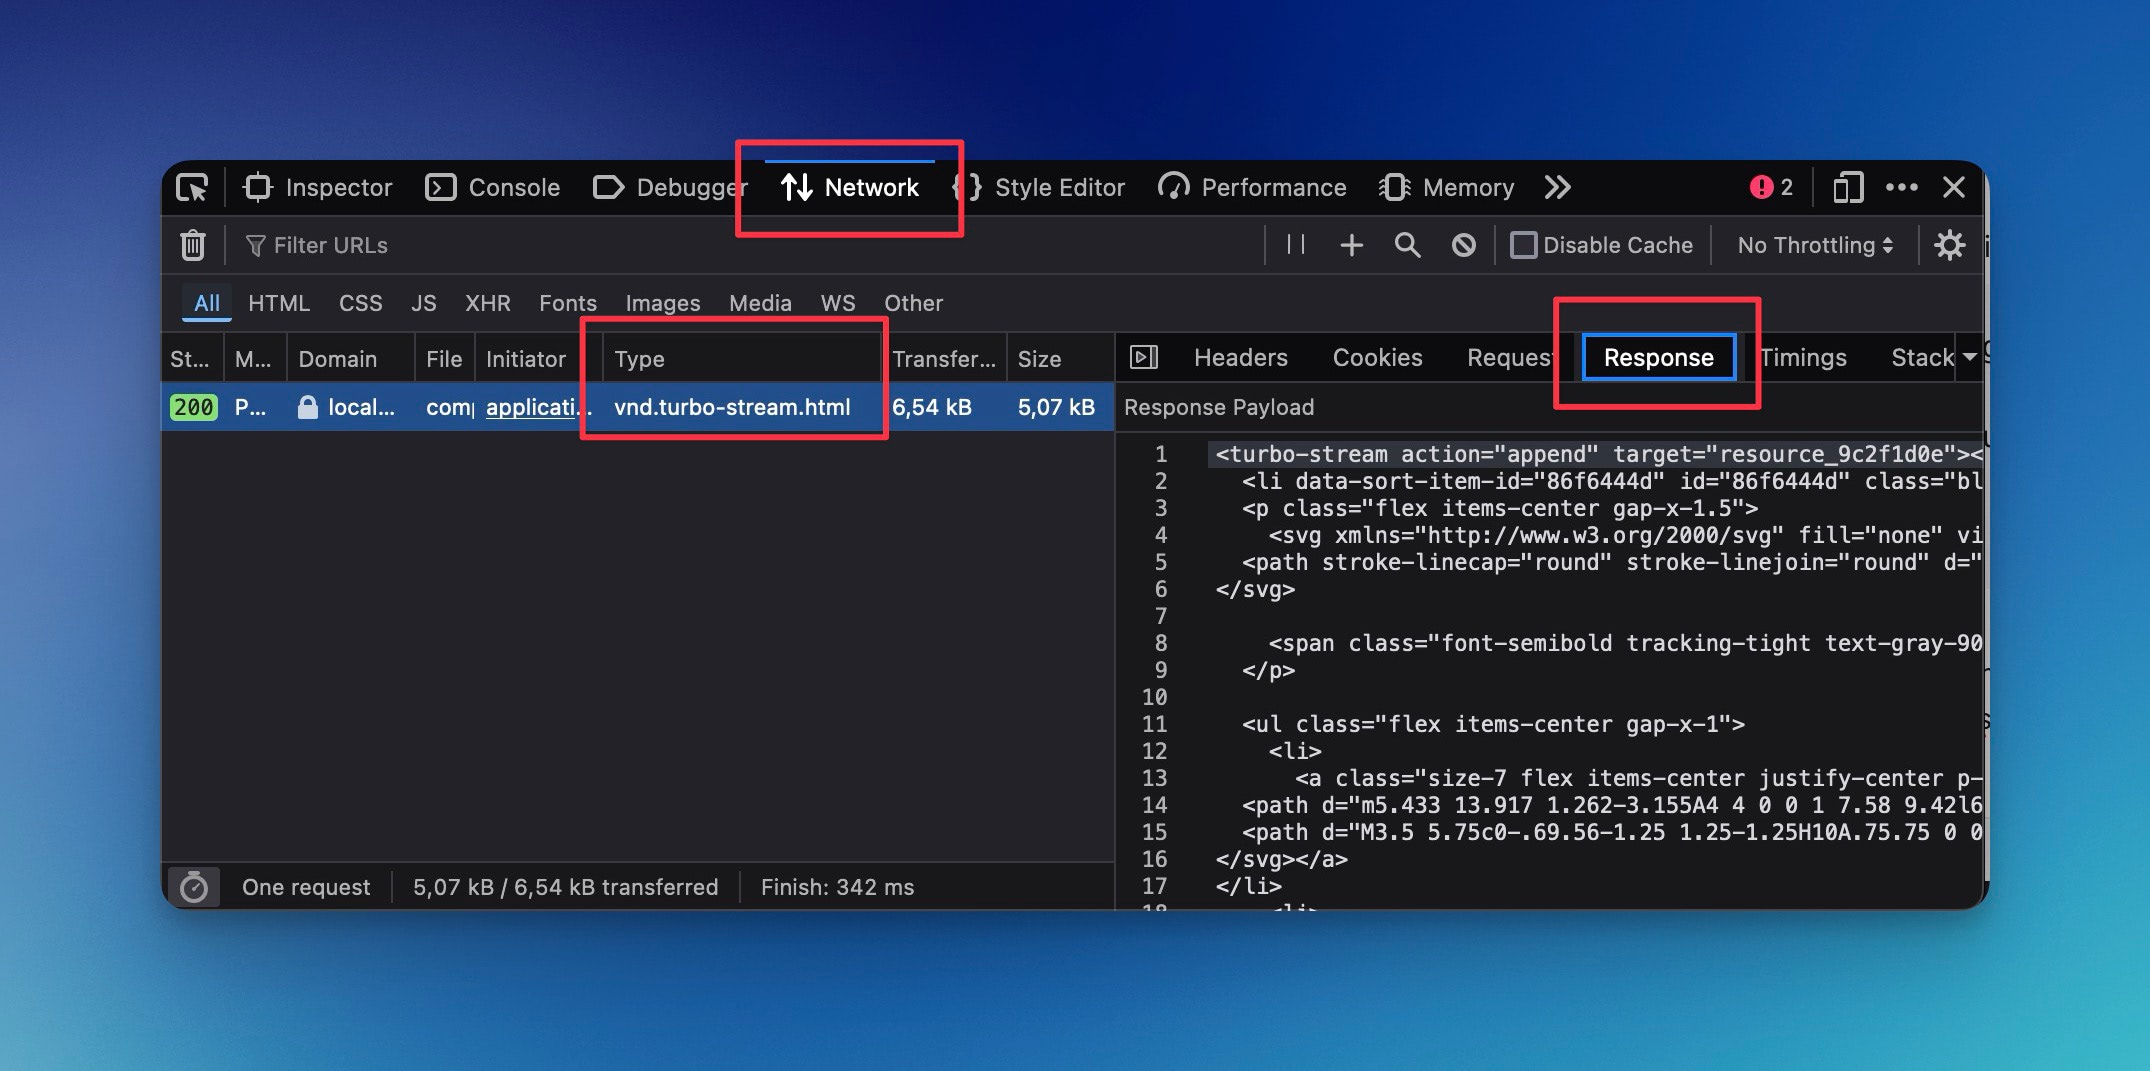
That looks an awful lot like the Turbo Stream response you create for controller actions! The only big difference is the template-element wrapped around the HTML (coming from a partial or ViewComponent). The template-element is a container for holding HTML content that is hidden.
💡 You can see responses like these in your browser’s devtools.
Once the turbo stream element is injected into the DOM, Turbo takes over. turbo-stream is nothing more than a custom element. It is defined here. You can see it in turn defines a connectedCallback() function. That function is called each time the element is added to the document; this is a feature of custom elements.
So what happens next? Let’s go over the most important parts, step by step. Brace yourselves! 🏎️💨
- a custom event,
beforeRenderEvent, is dispatched; - this event calls the renderElement function;
- then performAction is called;
- the action defined is then called.
In that last file, you can see all the supported, default, actions for Turbo Stream (append, prepend, replace, etc.). If you are, even a little bit, familiar with JavaScript, you should easily grasp what each separate action is doing (if not; check out JavaScript for Rails Developers 💡). In essence, except for the remove action; grab the HTML from within the template-element and add it to the DOM (based on the action; append, prepend, after, etc.).
With that knowledge, you might see that you can just insert that custom turbo-stream element manually and Turbo knows to pick it up.
<html>
  <head>
    <script src="https://unpkg.com/@hotwired/turbo"></script>
  </head>
  <body>
    <ul id="resources">
    </ul>
  </body>

  <turbo-stream action="append" target="resources">
    <template>
      <li>
        <p>I am appended using Turbo Streams! 🤯
      </li>
    </template>
  </turbo-stream>
</html>
Just copy above HTML and view it in the browser. You will see the li-element being appended to the ul-element. 🤯 Then using your browser’s dev-tools, paste another turbo-stream element anywhere in the DOM:
<turbo-stream action="prepend" target="resources">
  <template>
    <li>
      <p>I am now prepended using Turbo Streams! 🥳
    </li>
  </template>
</turbo-stream>
Pretty cool, right? Turbo uses many features from the browser to give that smooth developer experience we all love. Now you know how Turbo Stream works behind the scenes!
Want to read me more?
-
Introducing Turbo Transition: create smoother Turbo Streams
New from Rails Designer: Turbo Transition. A “minion” for Turbo-Frames and Streams that transitions elements as they enter or leave the DOM. -
Turbo Drive, Frames, Streams, Morph? What to use?!
Hotwire comes with various Turbo options. It is not always clear which one to use and when. This article explains my thoughts and a guideline to help you choose the right tool for the job. -
ViewComponent over Turbo Stream Broadcasts
Explore the power of Turbo Stream Broadcasts for real-time web updates without custom JavaScript. Learn how Turbo Streams work with WebSockets for instant UI changes, the differences between Turbo Stream Broadcasts and Responses and how to broadcast ViewComponents effortlessly. Perfect for developers looking to enhance real-time interactivity in Rails applications.
Over to you…
What did you like about this article? Learned something knew? Found something is missing or even broken? 🫣 Let me (and others) know!
Comments are powered by Chirp Form
{{comment}}