In almost every (SaaS) app (and marketing sites) I built, I added (at some point), a little Easter egg. Small, little things, tweaks or jokes to the UI I would tell no one about, but that would certainly put a smile on their face.
One way I have done this is by using a Konami code. The Konami code (↑ ↑ ↓ ↓ ← → ← → B A) originated in Japan in the 1980s as a cheat code for Konami video games. The code became legendary when it was included in Contra (1987), where it gave players 30 extra lives. Since then, it has appeared in hundreds of games and websites as a cultural Easter egg.
Today I like to show how to add this in a reusable way by using Stimulus’ Values API and using (dispatching) a custom event that can be listened for on other Stimulus controllers.
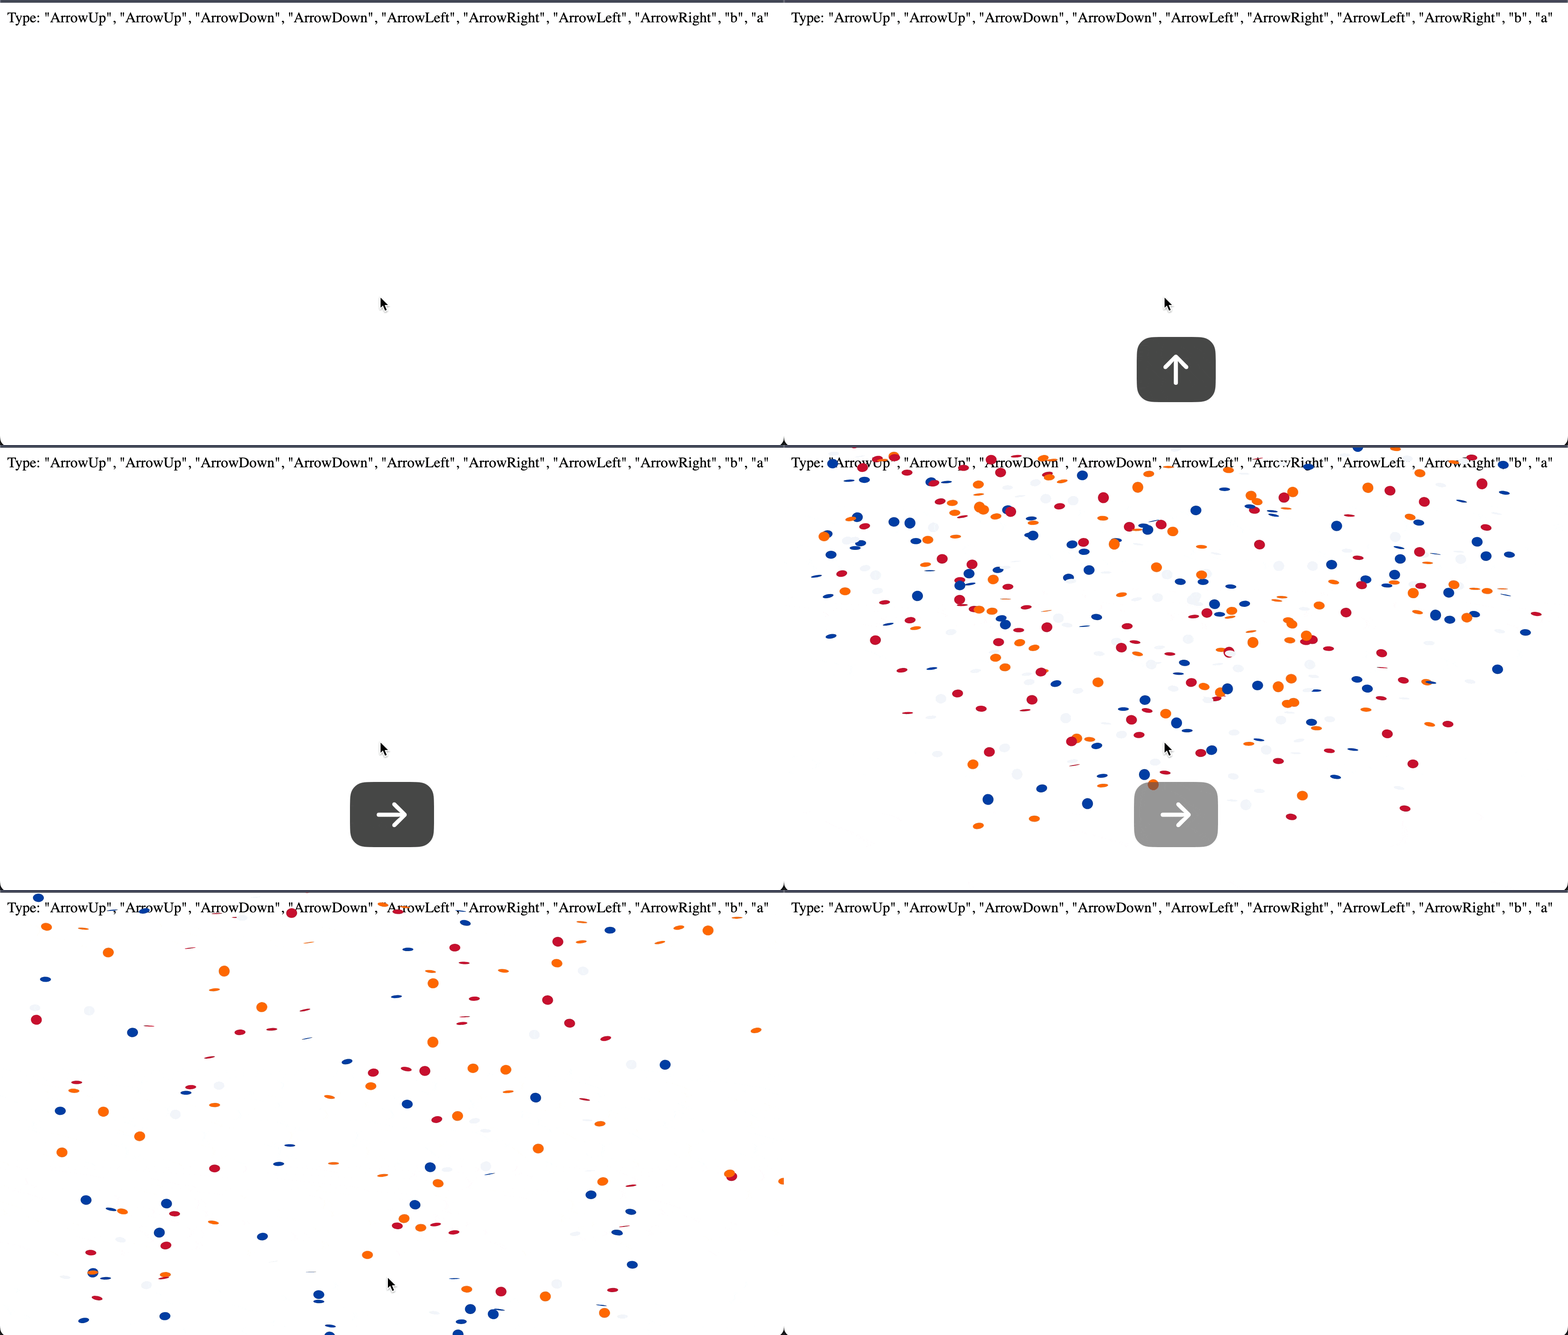
This is what I am after:

The code for this article can be found in this GitHub repo.
As often, I like to start with the HTML.
<div data-controller="sequence" data-action="keydown@window->sequence#detect">
  Type: "ArrowUp", "ArrowUp", "ArrowDown", "ArrowDown", "ArrowLeft", "ArrowRight", "ArrowLeft", "ArrowRight", "b", "a"
</div>
This HTML sets up a Stimulus controller called “sequence” and attaches a keydown event listener to the window. When a key is pressed anywhere on the page, the detect method on the sequence controller will be called.
The Stimulus controller is fairly simple:
import { Controller } from "@hotwired/stimulus"

export default class extends Controller {
  static values = {
    sequence: {
      type: Array,
      default: ["ArrowUp", "ArrowUp", "ArrowDown", "ArrowDown", "ArrowLeft", "ArrowRight", "ArrowLeft", "ArrowRight", "b", "a"]
    }
  }

  initialize() {
    this.#resetSequence()
  }

  detect({ key }) {
    this.#enteredKeys.push(key)

    if (this.#isSequenceTooLong) this.#enteredKeys.shift()

    if (this.#isSequenceMatched) {
      console.log("Sequence matched! 🎉")

      this.#resetSequence()
    }
  }

  // private

  #enteredKeys = []

  #resetSequence() {
    this.#enteredKeys = []
  }

  get #isSequenceTooLong() {
    return this.#enteredKeys.length > this.sequenceValue.length
  }

  get #isSequenceMatched() {
    return this.#enteredKeys.join(",") === this.sequenceValue.join(",")
  }
}
The controller maintains an array of entered keys. Each time a key is pressed, it’s added to this array with push(). If the array gets too long, the oldest key is removed with shift(). This creates a “sliding window” of the most recent keystrokes.
Private methods (denoted with the # prefix; should be familiar now for regular readers) are used to keep the code clean. The #isSequenceTooLong getter checks if the entered keys array exceeds the target sequence length. The #isSequenceMatched getter compares the entered keys with the target sequence by joining both arrays into strings.
If you test this code and enter the Konami sequence, you’ll see the Sequence matched! 🎉 message in your browser console. Hurray! 🎉
Now let’s extend this by dispatching a custom event instead of just logging to the console. Here’s the addition to make:
  if (this.#isSequenceMatched) {
-     console.log("Sequence matched! 🎉")
+     this.dispatch("matched", { detail: { sequence: this.sequenceValue } })

      this.#resetSequence()
  }
dispatch is a convenience method (to dispatch (orly?) custom events) in Stimulus that takes an eventName (which will be prefixed with the controller’s name, separated by a colon, i.e. sequence:matched). The long-hand way to write it is:
const event = new CustomEvent("sequence:matched", {
    bubbles: true,
    detail: { sequence: this.sequenceValue }
  })

window.dispatchEvent(event)
Custom events are a powerful way to communicate between different parts of your JavaScript. This pattern is also used extensively in Turbo, where events like turbo:load and turbo:frame-render allow you to hook into its framework operations (check out this article how Turbo Streams work behind the scenes).
To add some actual fun to this “Easter egg”, let’s add a confetti effect when the sequence is matched. First, add this HTML to listen for the custom event:
<div data-controller="party" data-action="sequence:matched@window->party#confetti"></div>
Simple. This sets up a “party” controller that listens for the sequence:matched event on the window. When the event occurs, it calls the confetti method.
Now let’s create the party controller:
import { Controller } from "@hotwired/stimulus"
import JSConfetti from "js-confetti"

export default class extends Controller {
  connect() {
    this.confettiParty = new JSConfetti()
  }

  confetti() {
    this.confettiParty.addConfetti({
      confettiColors: ["#FF6600", "#C8102E", "#f1f5f9", "#003DA5"],
      confettiRadius: 6,
      confettiNumber: 500,
    })
  }
}
This controller uses the js-confetti library to create a colorful explosion when the sequence is matched. The colors are set to Dutch-themed colors: orange (#FF6600), red (#C8102E), white(ish) (#f1f5f9), and blue (#003DA5). 🇳🇱
Don’t forget to add js-confetti to your project:
bin/importmap pin js-confetti
# or
npm install js-confetti
This approach is reusable and extensible. You can add multiple listeners for the same event to trigger different actions, or you can customize the sequence to something other than the Konami code.
And that is it! 🎉 Now you too can add some fun to your apps using konami. 🎮🎊

💬 Over to you…
What did you like about this article? Learned something knew? Found something is missing or even broken? 🫣 Let me (and others) know!
Comments are powered by Chirp Form
{{comment}}